Tags
Andy Mizerek, Andy Peeke, Brooklyn, Chance favors the prepared., Christopher Rex Stone, David Tejada, Flash Photography, Lucas Gilman, Manhattan, Mentor Series, New York skyline, Nikon, Painting with light, Paul Peregrine, Popular Photography Magazine, Portrait Photography, Rachael M. Woods, Richelle Oslinker, Roosevelt Island, Speedlight

“City of Motion” – New York Skyline from Brooklyn as three boats pass on a misty evening – Click on photo for full image
You become the light, in a good portrait photograph.
“Chance favors only the prepared mind,” Louis Pasteur wrote. Applying this wisdom to portrait photography, advance preparations for background, foreground, composition, and lighting give photographers a much better “chance” to create a great image.
This is part 2 of my summary about the Mentor Series lighting workshop in New York City this summer. I promised some “photo tips” and an assortment of images taken with the professional models. The primary sponsors of this specialized lighting workshop were Nikon and Popular Photography magazine, on behalf of Mentor Series (www.mentorseries.com).
The more we learn, the more we want to learn. I wanted to sharpen my lighting skills for portrait photography. The workshop objective was to refine the use of flash photography and portable lighting equipment (soft boxes, umbrellas, grids, etc.) to achieve excellent portrait photographs…indoors and outdoors. We used Nikon Speedlight flash units. The program was primarily for advanced amateurs and professionals, but the information would be helpful to all photo enthusiasts.
I am posting some of my portraits from the workshop below, followed by eight “photo tips” for aspiring photographers. Working with experienced models was a pleasure. I’ll also post a photo of our Mentor group in New York, at the end. We learned from each other, as well as from three excellent Nikon Mentors: Lucas Gilman, David Tejada, and Paul Peregrine, all mentioned in my last article. A special “thank you” goes to the Mentor staff, who created a flawless workshop experience.
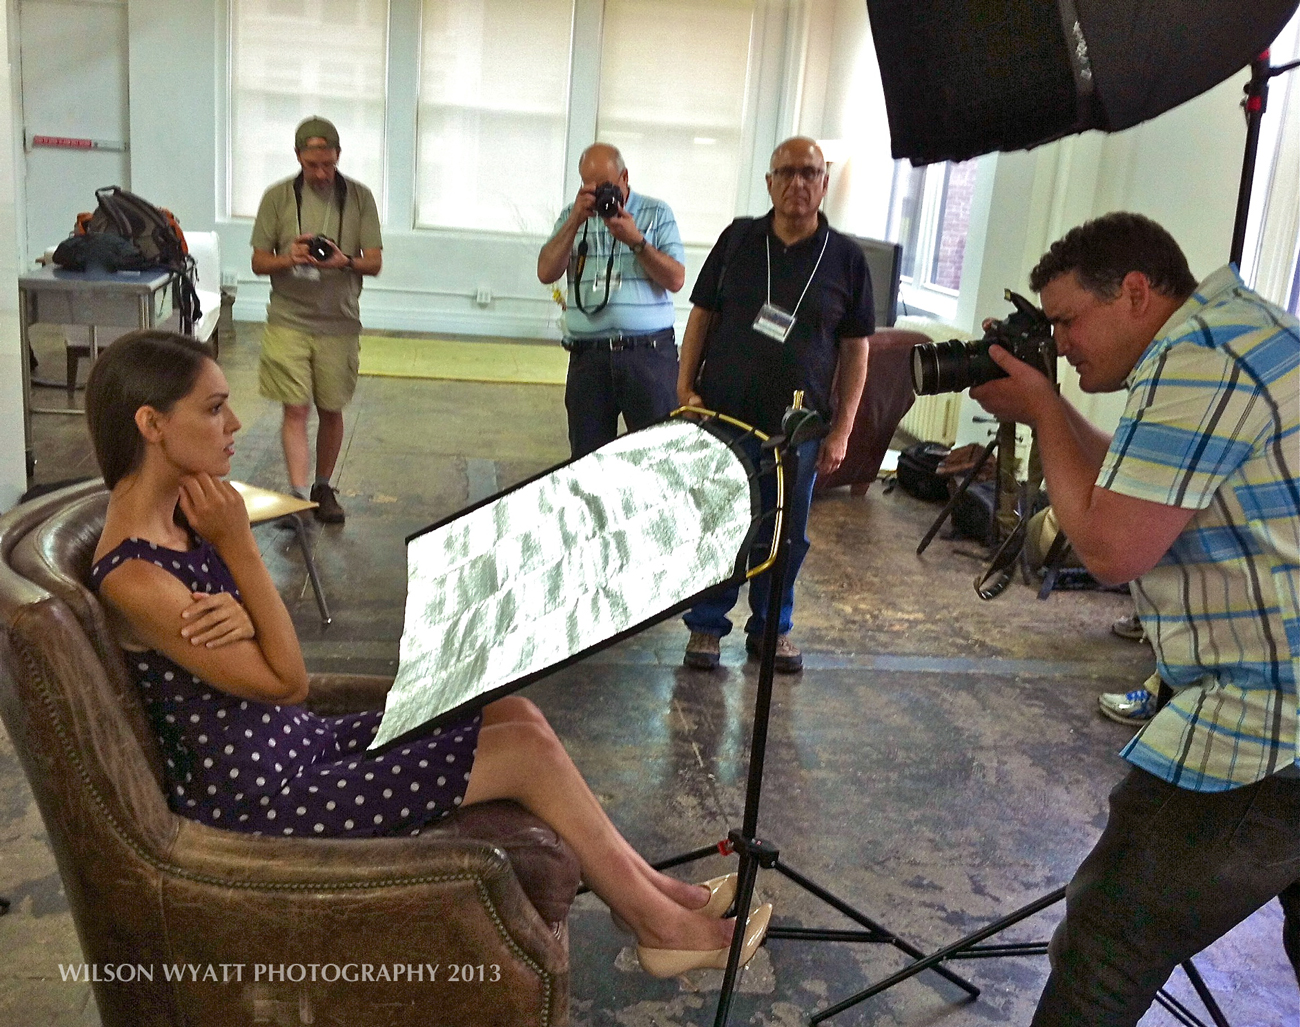
Nikon Mentor Lucas Gilman photographing model Rachel M. Woods (photo by iPhone)
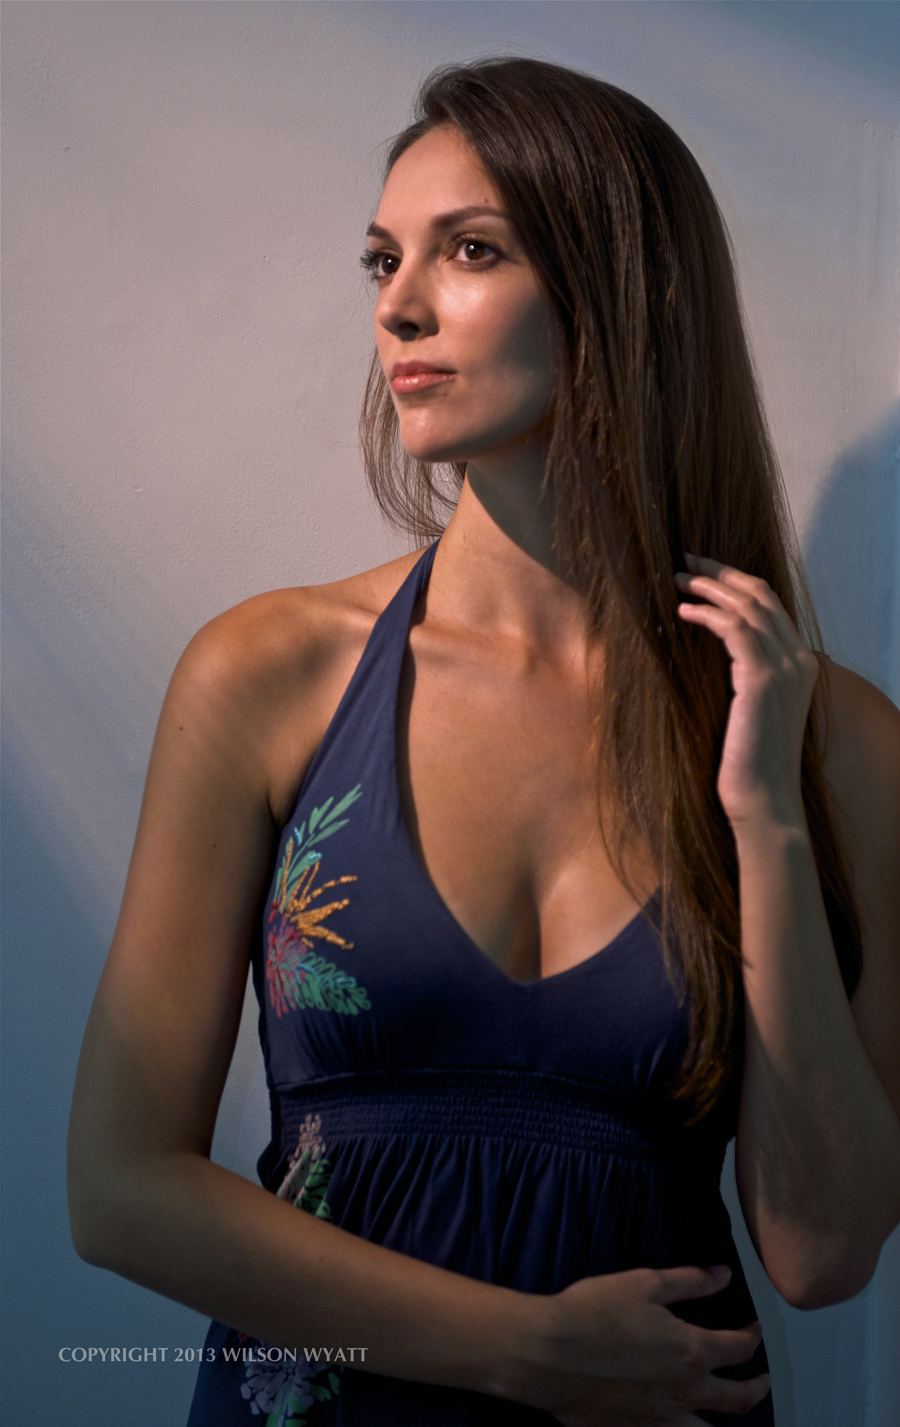
My studio portrait of Rachel. Her professional website is http://www.rachelm.co.uk. – Click on photo for full image.
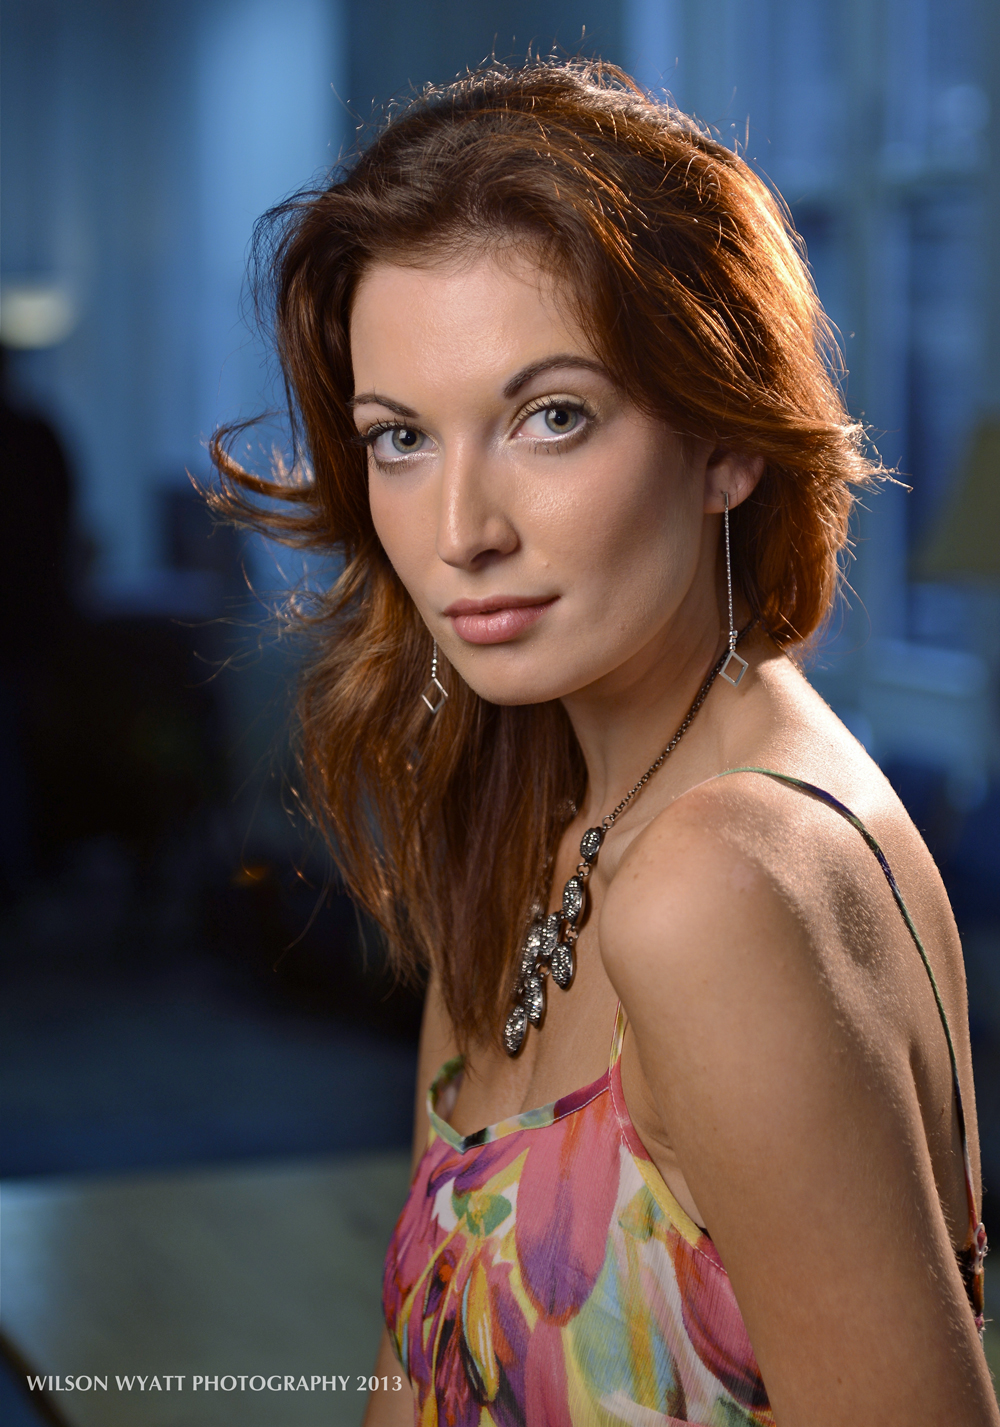
Studio portrait of professional model Richelle Oslinker – Click on photo for full image.
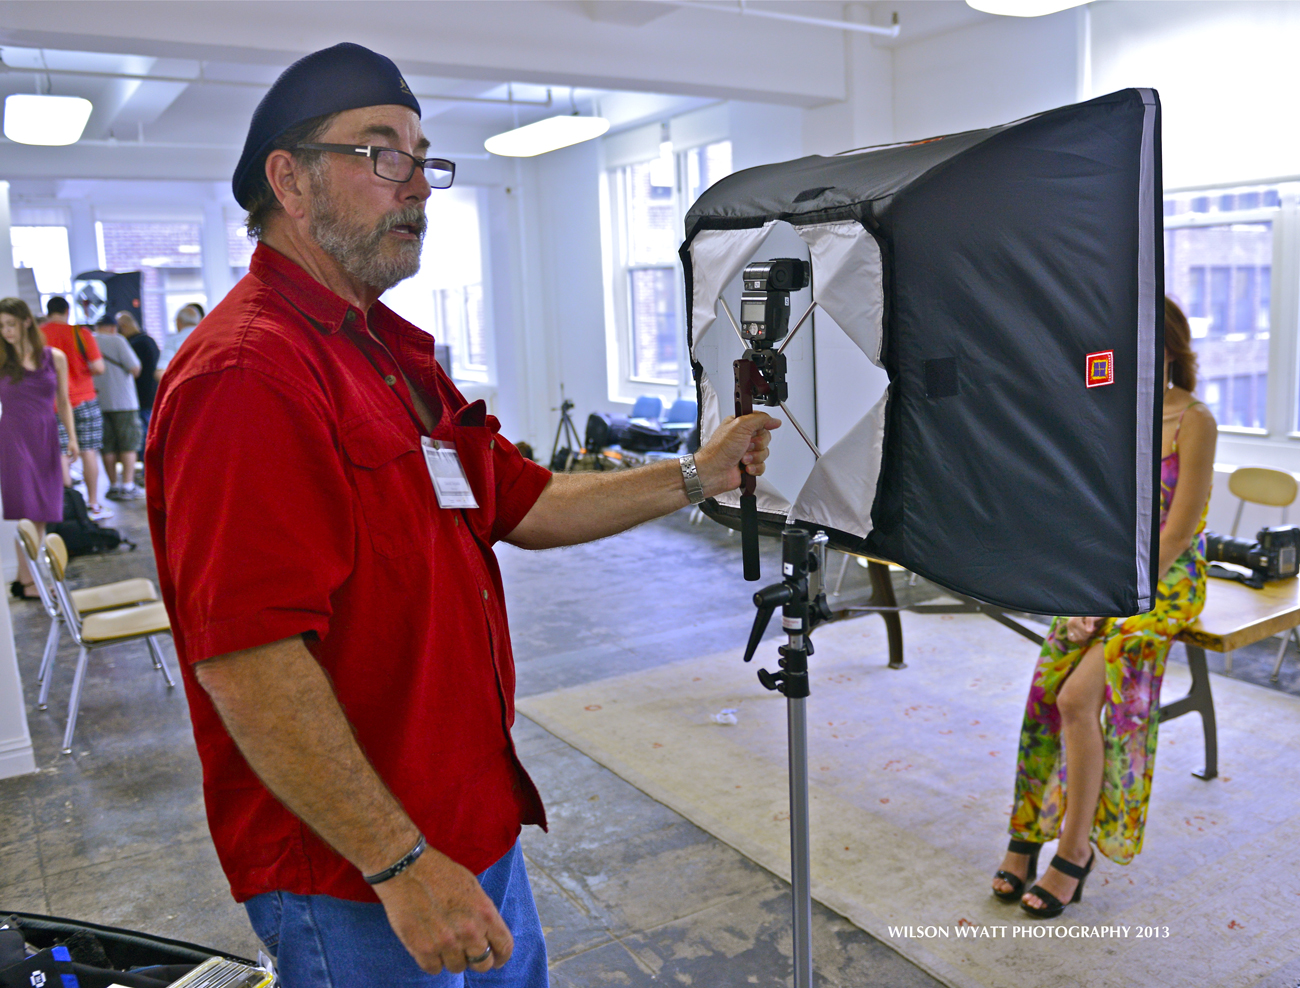
Nikon Mentor David Tejada explains using “Four Square” soft box lighting while photographing model Richelle Oslinker.
Studio portrait of professional model Andy Peeke – Click on photo for full image.
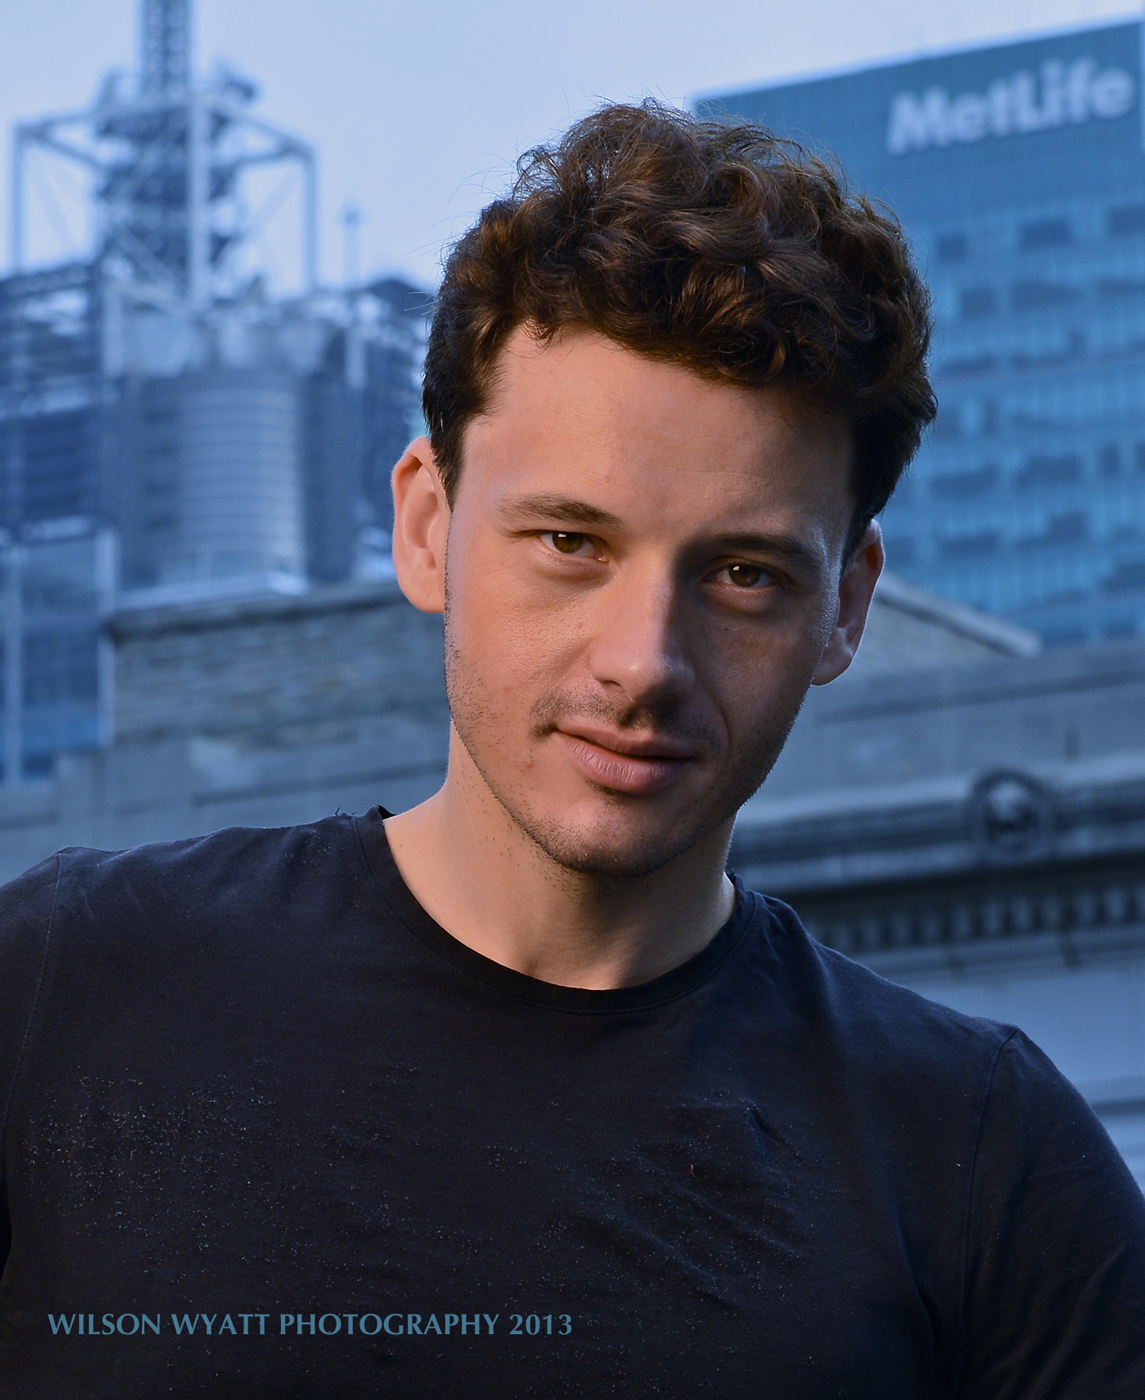
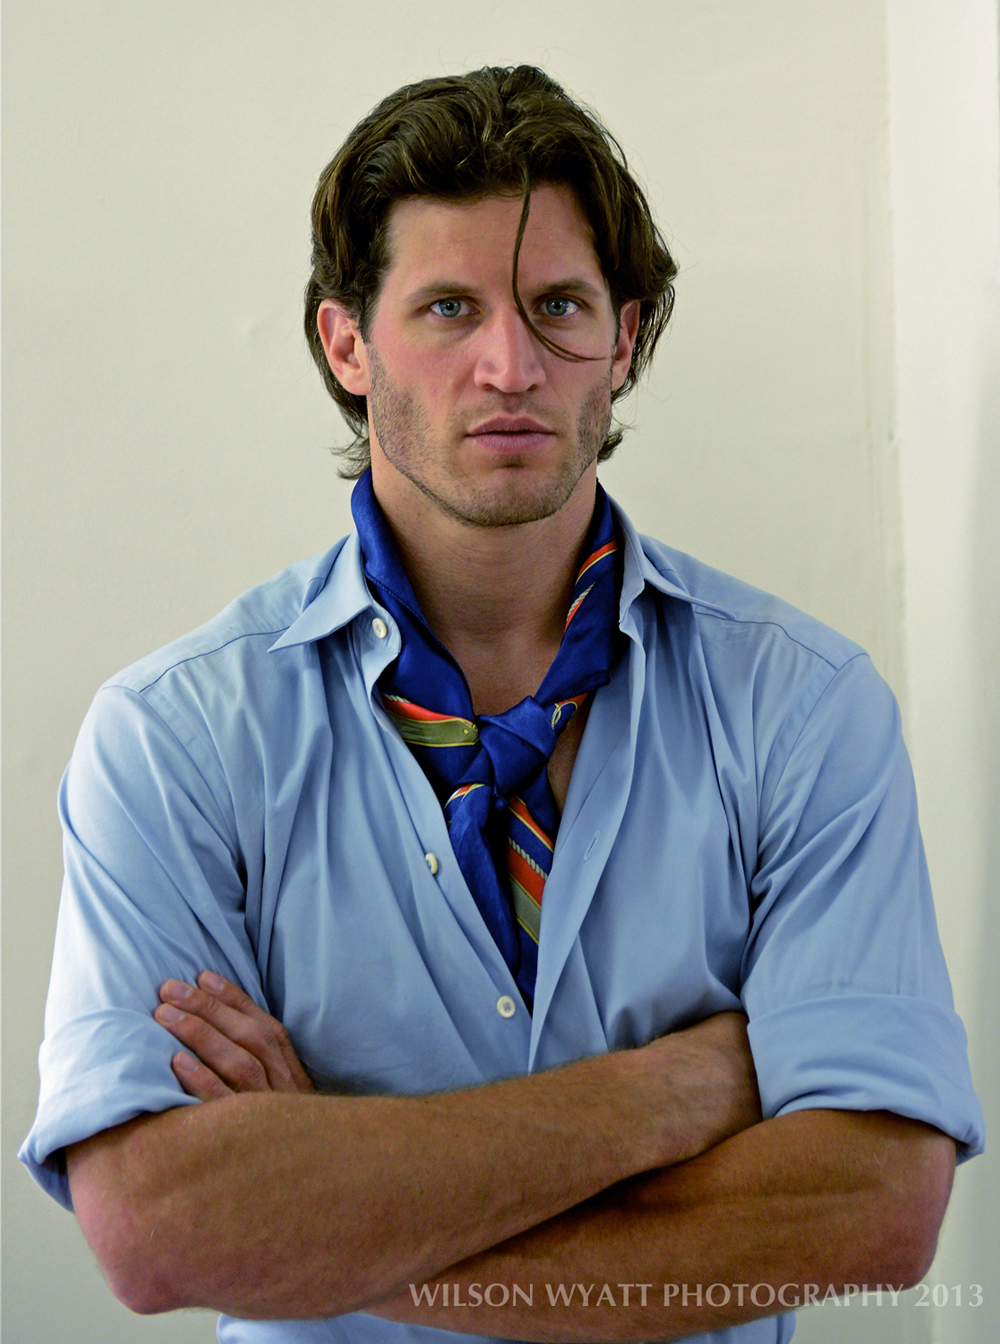
Rooftop portrait of professional model Christopher Stone, with MetLife building in the background – Click on photo for full image.
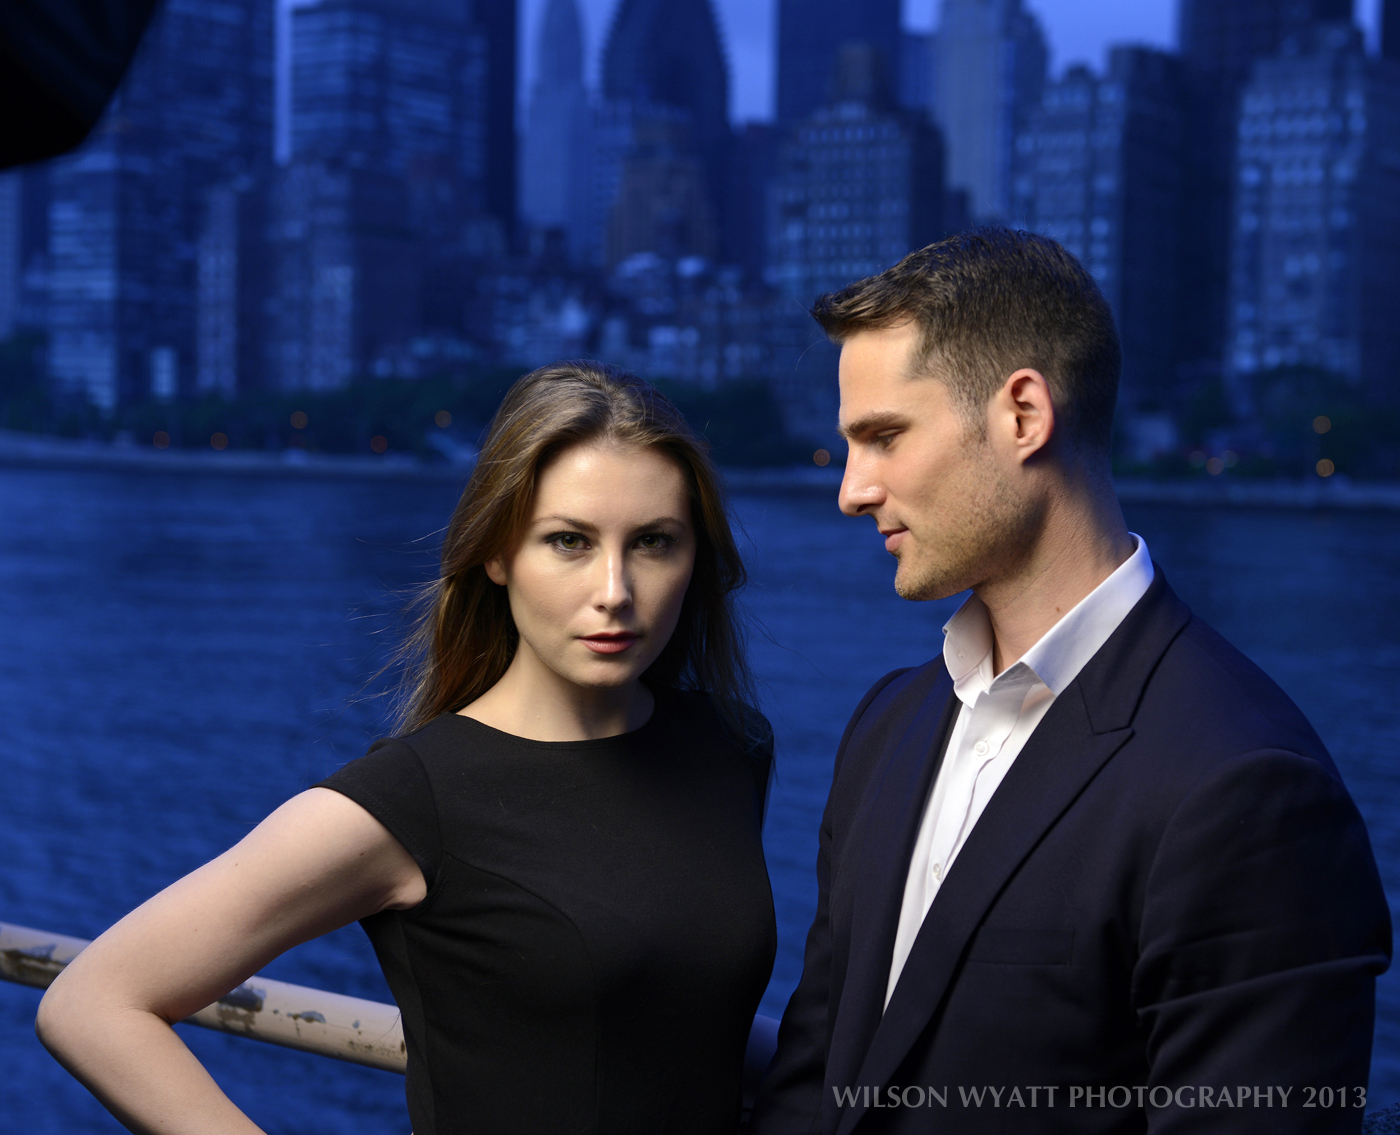
Outdoor portrait of professional models Andy Mizerek and Nastasia at night with the Manhattan skyline in the background, taken on Roosevelt Island. – Click on photo for full image.
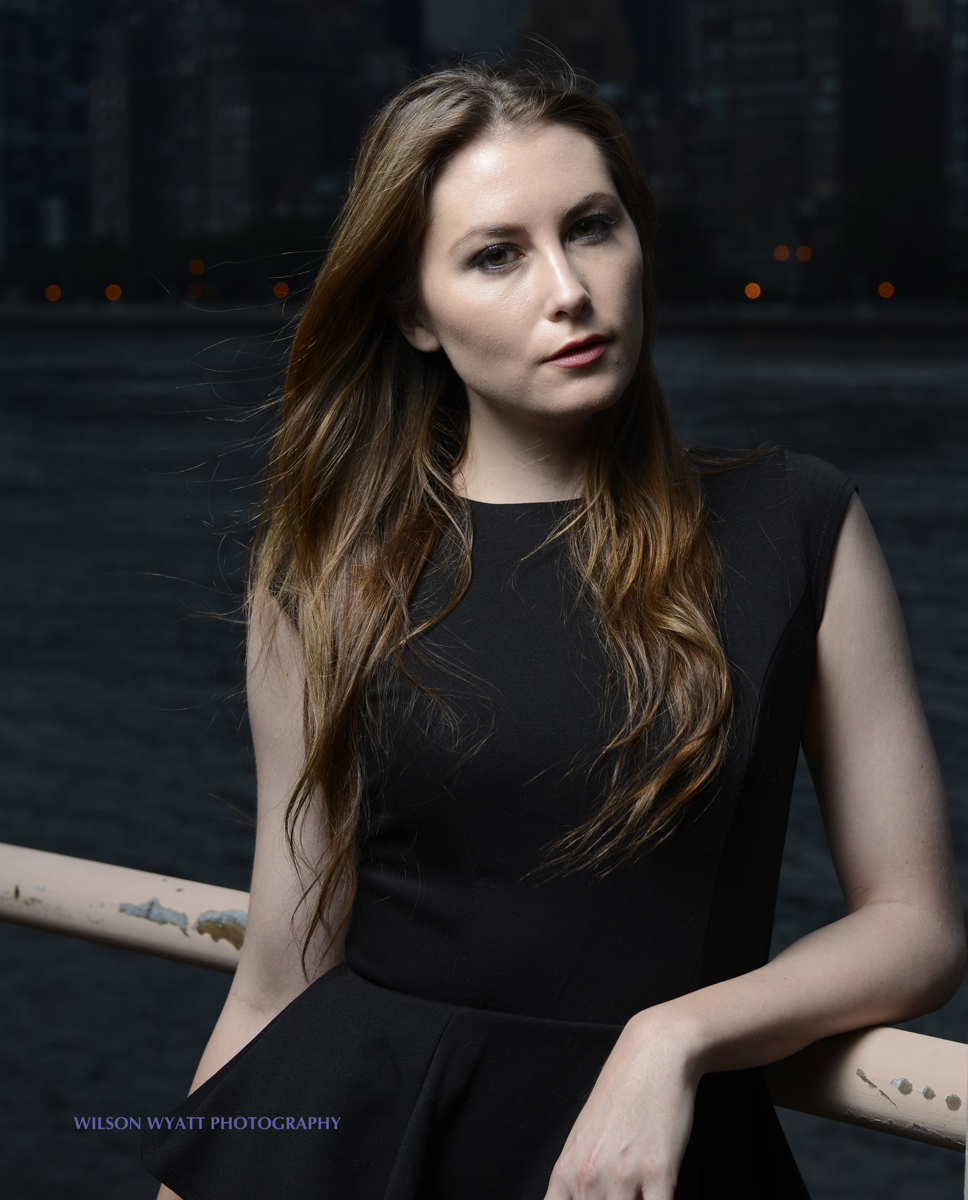
Outdoor portrait of professional model Nastasia at night against the Manhattan skyline, taken on Roosevelt Island. – Click on photo for full image.
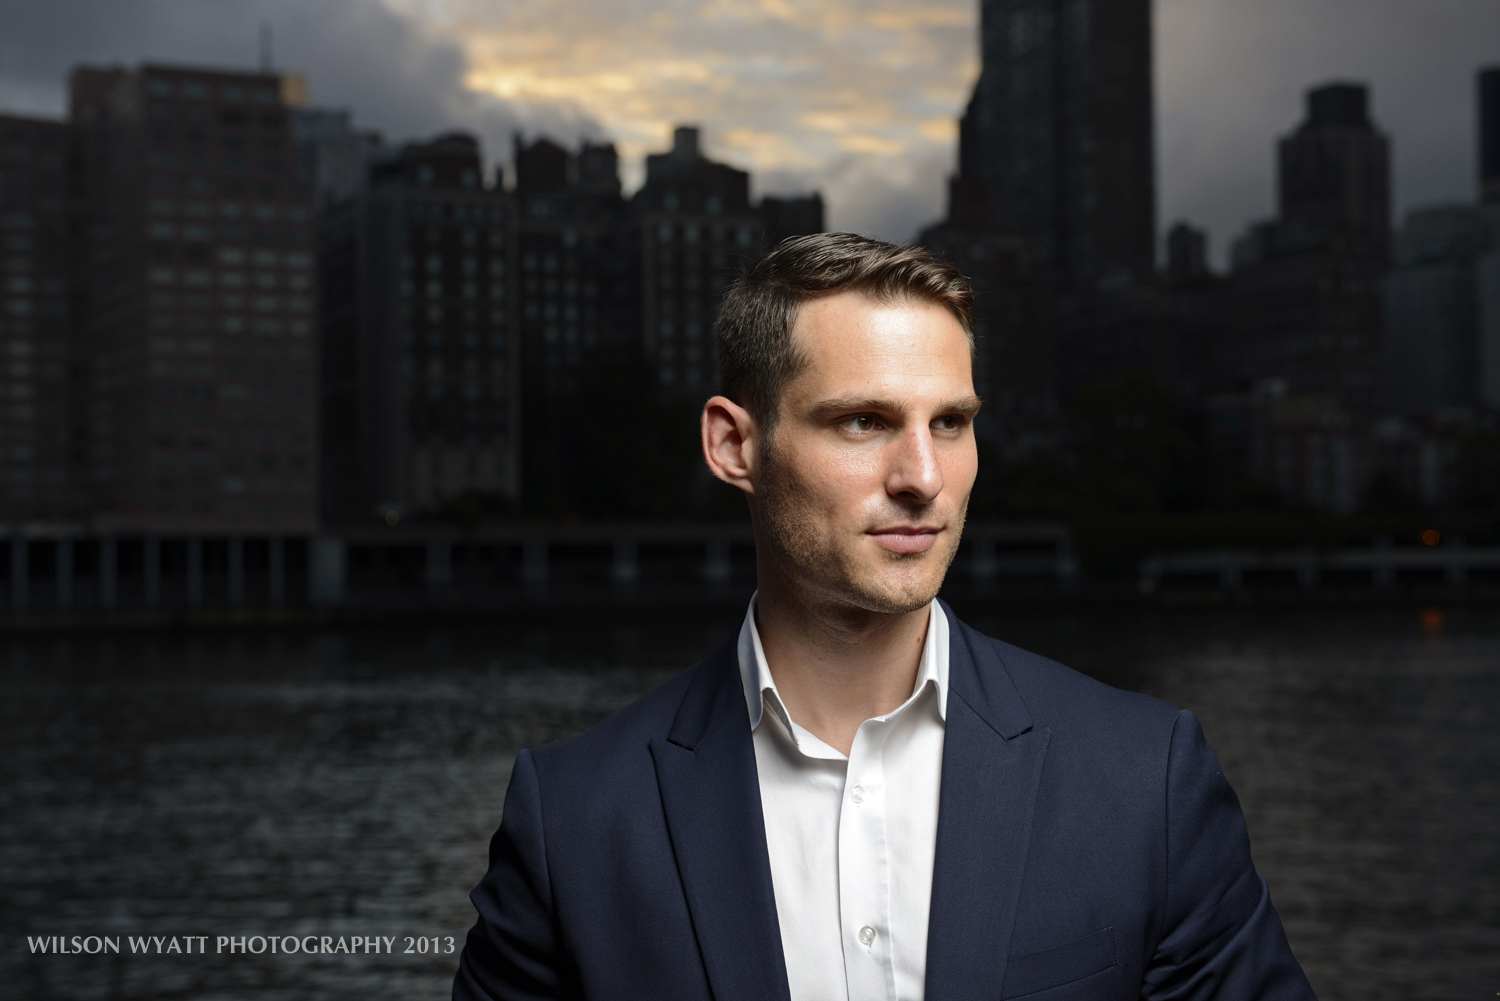
Outdoor portrait of model Andy Mizerek photographed against the New York skyline in the background, at dusk. Taken on Roosevelt Island- Click on photo for full image.
One of the keys to taking effective portraits is the choice and color tone of the background, which can make an eye-catching contrast to the clarity and natural color tones of the subject. This is a photographer’s choice and an advantage afforded by using flash to assist ambient light. Simple changes in white balance were used to alter the background colors in the outdoor images above, in contrast to the models’ natural skin tones.
Here are eight “photo tips” I’m pleased to share:
Tip #1 – Always choose the background first. Consider the ambient (natural) light, the desired focus (or lack-of-focus), and the color tones you want in the background.
Tip #2 – Rule: shutter speed controls ambient light and motion; the aperture controls light from the flash.
Tip #3 – Therefore, the shutter speed controls the natural light of the background. Light on the subject is altered by the flash and, therefore, it is controlled by aperture.
Tip #4 – A basic principle of lighting: Exposure = Aperture + Shutter Speed + ISO.
Tip #5 – Subject lighting: The angle of incidence equals the angle of reflection. Think of the three points of a triangle as: light source – subject – camera.
Tip #6 – To blur the background of an image, use a high-speed shutter synchronization with the flash, allowing for a larger aperture, changing depth-of-field.
Tip #7 – For critical control of skin tone, use a gray card to set the camera’s white balance.
Tip #8 – “The eyes make the shot.” Paying special attention to the eyes gives intimacy to a portrait, as seen above. Catching the blink of the flash in the eyes brings life to a still photograph.
Factoid – Regardless of a camera’s advanced technology today, for every increase of 1/2000 sec. shutter speed, the camera loses some degree of light accuracy.
Our happy group of experienced photographers for the Mentor Series Lighting workshop: